This edition of POP Tips written by 2016 Orchard Apprentice Alkebu-lan Marcus and Education Director Alyssa Schimmel.
What if you could turn vegetative waste like twigs, wood chips, pruning clippings, and overwintered compost crops into a valuable, organic, soil-additive that promotes the growth and fertility of future orchard and agricultural plantings? You can!
Enter biochar, a highly purified and stable form of charcoal that carries with it a range of applications for increasing soil fertility through water and nutrient retention and positively impacting the environment through the sequestration of carbon and greenhouse emissions, reducing nitrogen leaching into groundwater reserves, and the adsorption of lead, nickel, cadmium and other heavy metals. Biochar is a true star!
Before we get into a how-to on home-scale biochar production, we’ll focus on a couple of the key applications for orchard growers including its positive impact on soil moisture and nutrient retention, and the support of mycorrhizal and microorganism development (reducing the long-term need for ongoing fertilizer, pest applications, and irrigation). These functions of biochar have huge measurable impact on orchards through many stages of growth, from positively impacting fruit yield and helping with the reactivation of mature sites, to ensuring stable root development of young, grafted trees and cuttings, and preventing fungal infections that may impact fruit-producing trees.
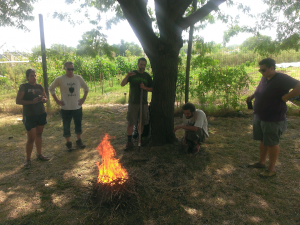
Though biochar is easy to acquire in the form of powder or chips from a number of suppliers, you can easily make your own with a few hours and some household recyclable materials, as outlined below. Some of the instructions below come from POP’s Biochar Workshop hosted last September 2016 with Dale Hendricks of Green Light Plants at Bartram’s Garden. You can read more about biochar along with FAQs from this local expert here. Look out for future workshops on biochar and other topics in orchard management and care through our events page.
History and Contemporary Fruit Growing Trials
The 2,000-year-old practice of transforming waste vegetation into fine-grained highly porous charcoal comes from a long history of soil management practices first examined in the Amazon Basin. Known as the ‘Secret of El Dorado’, dark, human-made soils bolstered by charcoal along with terra cotta shards, animal waste, and compost called terra preta (“dark earth”) were found to support food crops that would otherwise be challenged in the naturally occurring soils that were thin and poor in nutrient density (1).
As in days of yore, the application of biochar to soils in contemporary studies have resulted in bigger, healthier fruits, and nuts. A five-year trial conducted in Australia on apple trees found apples planted in biochar produced fruits that are up to 20 grams heavier than fruits from untreated trees, with no decrease in fruit firmness or sugar content (3). In a Costa Rican trial, biochar alone increased the fresh weight production of cacao fruits (pods) per tree and per hectare (3). The height and stem diameter of seedlings increased after planting.
Biochars’ Chicken-Wire Structure and Impact on Water Retention
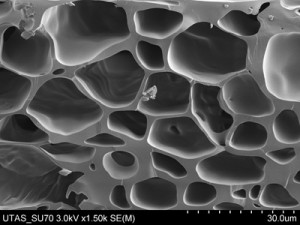
The key to biochar’s ability to hold water and nutrients comes from the process of pyrolysis whereby organic matter is charred at high heat with limited oxygen creating a strong grapheme structure, a sheet of carbon rings with millions of micropores that join to look like chicken wire. In this form, it takes thousands of years to break down (6). After a good rain or watering, the passageways created by this grapheme structure hold water for plants sensitive to water stress and help protect soil nutrients from runoff. In one sandy loam soil, biochar increased water holding capacity by 23% (3). When applied to clay or compacted soils, it increases drainage and reduces standing water on soil surfaces, reducing the likelihood of fungal infections like powdery mildew and botrytis that can often affect stone and pome fruits.
Biochar can produce stronger transplants that can be moved to the field earlier and survive better as it makes water in the soil more available to plants for uptake and supports the development of adventitious roots. Biochar can also help to maintain vigor and productivity in mature and older orchards impacted by root aging and drier soils, while biochar soil improvement can make replanting more efficient as well (3).
Support of Microorganisms and Mycorrhizae
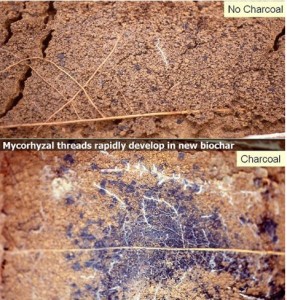
Either by supporting nutrients supplied directly or indirectly by improvements in soil quality, biochar can help influence the nutrient value of the soil through boosting microorganism and mycorrhizal fungi colonies. Biochar absorbs humic acid which allows for a higher nutrient retention in turn enhancing the efficiency of fertilizers and help with leaching. One plant enhancing microorganism known as Trichoderma is boosted in soils amended with biochar, which helps increase defense mechanisms within the plant that prevent damage from insects, pests, and diseases. Increased resistance to pests and diseases combined with better use of nutrients and water can result in increased yields and early production (3)
The findings of Dr. Makato Ogawa, a Japanese scientist with 30 years of biochar research, suggests that biochar is the preferred habitat of mycorrhizal fungi as biochar serves as a storage bank of water and nutrients propelling fungi growth, and relatedly, that of plants–even in poor soils (6). As mycorrhizae and plant roots are in symbiotic relationship, with the plant feeding sugar from their root secretions to fungi and fungi offering water and nutrients to plants in return, Ogawa concluded that bits of biochar allow the hyphae to grow faster and further, a finding that supports plant and food forest vitality.
Making & Using Biochar
So, how does one go about using biochar at their site? Whether you choose to buy or make your own, Dale Hendricks recommends applying fresh biochar to gardens in the fall starting with 5% by volume at a beginning threshold up to a total of 15% (7), choosing either to mix it into soil mixtures or add 1-2” to top off raised garden beds as if it were compost.
Because biochar is so adsorbent and could compete with plant roots for available nutrients, Hendricks recommends inoculating biochar with an active ingredient like compost tea and allowing it to sit for 2-3 months to work its way into the biochar before using.
Making Biochar via A Top Lit Updraft Stove
Instructions and Photos by 2016 POP Orchard Apprentice Alkebu-lan Marcus; Video tutorial here.
Things you’ll need:
- Drill
- Twine
- Tape Measure
- ½” drill bit
- ¼” drill bit
- Hammer
- Nail
- Quart size paint can
- Progresso soup can
- Tuna can
- Can opener
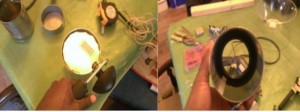
- First remove the bottom of your quart size paint can.
- Now use your ½” drill bit to drill 8 large holes in the bottom of the soup can and paint can. Use the twine to measure the circumference of the cans and divide by 8. Using your tape measure to mark where your holes will be.
- Using the same method as mentioned before, drill 16 small holes in the top of the soup can using a ¼” drill bit. (Use a 2 x 4 as a support to safely drill your holes if needed)

- Still using your ¼” drill bit punch holes into the bottom of the soup can.
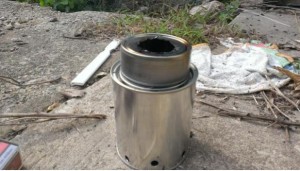
- Insert your soup can into the paint can, with ½” holes facing down.
- Cut a hole in your tuna can about half the diameter of the soup can and place it on top. You can use this can to concentrate the flame. Now, add your biomass which can include wood chips, twigs, etc. Add a splash of starter fluid and ignite the flame with a match. The tuna can placed atop the other three encourages the upward flow of the flame. Continue to add biomass.

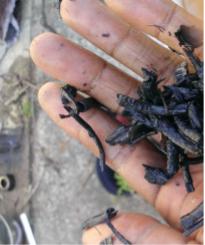
After you make your biochar, check to make sure it’s pure carbon and doesn’t have any violates or tar in it which can harm the soil. A good way to check is to smell it to see if it has any odors or touch it to see if it feels oily. If it is oily or smelly, throw it into mature compost to activate it before adding to your planting soil.
One simple way to activate the biochar is by mixing it with grass clippings and covering it with cardboard or leaves. Let this sit until the grass clippings are composted; this may take a few months but it’s definitely worth the wait. It’s okay if you add water to the mixture but do this in the fall if you want to have it ready for the following spring. Use equal parts grass and biochar. Let the mixture age in your compost.
For another alternative, mix equal parts of your completed biochar with worm castings and 5% of a food source such as cornmeal, flour, or molasses. Cover it and let it sit for two weeks. This method readies the biochar faster for use compared to the grass clippings method.
You’re well on your way to creating vital living soil! Please be safe, and remember you’re playing with fire. Your plants will thank you!
Local Biochar Suppliers
1. Brandywine Biochar, http://www.brandywinebiochar.com/local-services/
2. Soil Reef Biochar, https://www.soilreef.com/store/buy-biochar.php
References
1. http://www.biochar-international.org/biochar
2. http://sonomabiocharinitiative.org/about-biochar/
3. http://greenyourhead.typepad.com/files/wba-biochar-return-on-investment-orchards.pdf
4. http://www.ctahr.hawaii.edu/huen/nvh/biochar.pdf
5. http://journals.plos.org/plospathogens/article?id=10.1371/journal.ppat.1003221
6. http://www.dyarrow.org/SAREbiochar/BiocharAndMycorrhizae.pdf
7. http://greenlightplants.com/index.php/faq-for-biochar/
SUPPORT US! If you found this entry useful, informative, or inspiring, please consider a donation of any size to help POP in planting and supporting community orchards in Philadelphia: phillyorchards.org/donate.
