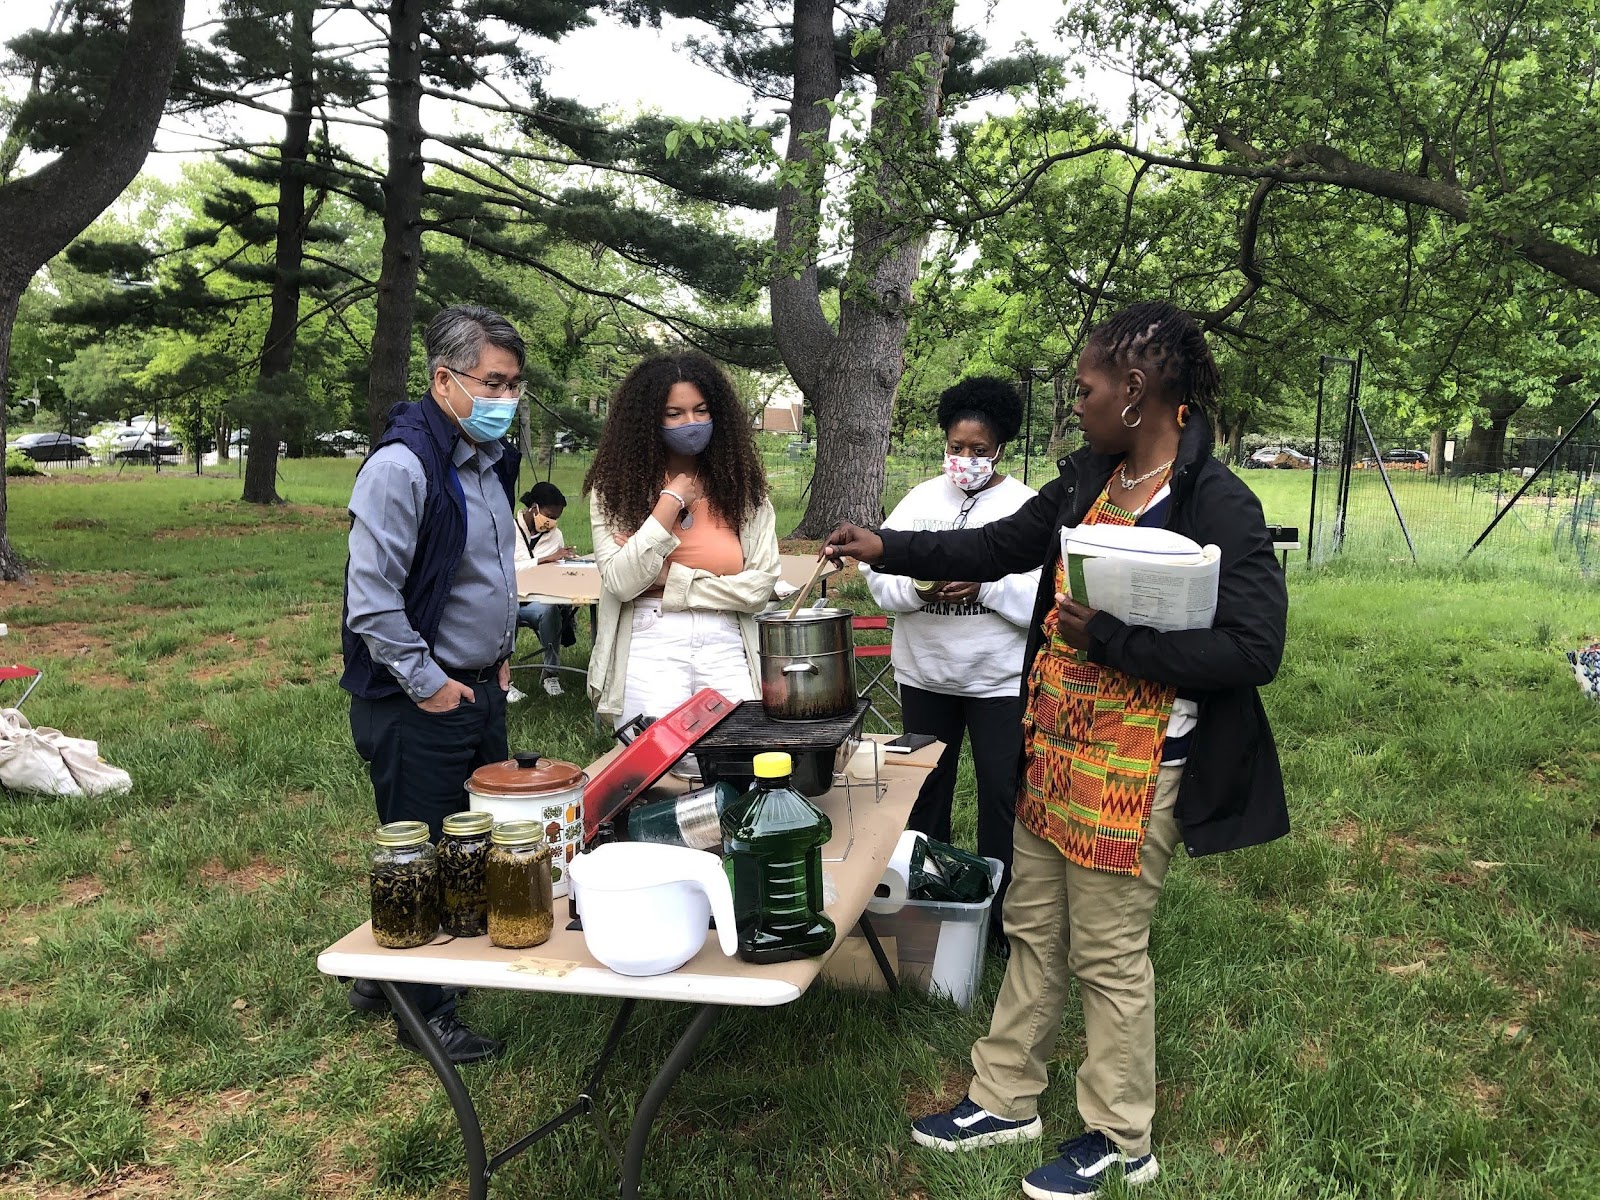
In May 2021, Nyambi Royster of Nyambi Naturals hosted a salve-making workshop with the Philadelphia Orchard Project in the beautiful and relaxing POP Learning Orchard at The Woodlands. Surrounded by towering pines and chattering birds and squirrels, Nyambi shared her broad herbal knowledge and guided us through making an Olive oil, Calendula, and Butterfly-Pea flower salve. Nyambi Naturals is an urban farm and apothecary located right here in Philadelphia, PA. They specialize in plant-based skincare, hair-care, and healthy lifestyle products such as body butters, soaps, scalp serums, and more. Their methods are infused with agro-ecology and a commitment to connect communities and individuals to the earth. Nyambi kindly shared with us some of her process while relating the ancestral roots of her learning and medicine.
If you weren’t able to make the workshop, don’t stress! Because we’re going to go over how to make your own salve and share tips for concocting your own recipe and acquiring different herbs.
What is a Salve?
Simply put, a salve is a topical application made from herb-infused oil and beeswax. When applied to the skin, it softens, allowing the properties of the oil to be absorbed. Salves can be used for a number of benefits including soothing muscular aches and pains, healing wounds and skin irritations, and relaxation through aromatherapy. Salves have been used by a variety of cultures, across continents for centuries. Due to its roots in folk medicine it’s difficult to track down an exact history or tradition. A benefit of this is that it can help us find our own roots in our ancestors, communities, and local ecologies. Recipes and knowledge passed down through generations help maintain oral traditions that may be lost to history books, or you can create your own practice to share. While salve making can be precise and strengthened by botanical knowledge, it’s also an opportunity to explore our own creativity and connections; there’s power in remembering what herbs and flowers your grandparents or old neighbors liked to use, how they used them, and continuing those traditions in your own way. You may even learn from and connect with new folks along the way.
How to Make a Herb-Infused Oil
Before the salve is made, we first need to make a herb-infused oil. To make it we will need a couple of things:
- Dried herbs of choice
- Fixed oil of choice
- Canning jar
- Cheesecloth or stocking
- Double boiler (optional)
- Essential oils (optional)
- Vitamin E oil (optional)
When choosing an oil, you want to make sure it’s a “fixed” oil, or carrier oil. This means that it will not evaporate when heated, unlike essential oils. Possible oils to work with are Coconut, Olive, Argon, Jojoba, Almond, Hemp, and more. You can even combine oils to blend their benefits. Once you have your oil or oils and your dried herbs you can do the infusion in one of two ways: Cold or Hot infusion.
Cold Infusion
Cold infusion is the most passive method, but takes the longest. For those looking for a more hands-off method and don’t mind practicing some patience, it’s an easy and effective method. You simply place equal parts dried herbs to equal parts oil in your canning jar. Now, it’s very important the herbs are thoroughly dried (fresh picked herbs and flowers take approximately 1-2 weeks to dry depending on the plant material), because if they are fresh they could grow mold and cause your mixture to go rancid!
With the herbs and oil together you can then stir it around with a sterile spoon or knife or roll the jar around in your hands until the herbs sink to the bottom. That’s your sign that the herbs are absorbing the oil and ready to be put away. You then place the jar in a cool, dark place for 2-8 weeks, occasionally returning to give the mixture a stir or top off the oil if desired.

The longer the herbs infuse, the more potent your oil will be. Once the infusion is finished, you can strain the oil into a sterile jar using a cheesecloth (or a stocking if you don’t have cheesecloth at home). While you could use a strainer, the cheesecloth or stocking method is more effective at keeping plant material out of the finished oil. Once the oil is strained, you can add vitamin E oil to help slow oxidation if desired (oil oxidation is a series of chemical reactions that degrades the oil and eventually causes rancidity). Finally, label the oil with the ingredients and the date and store in a cool, dark place. (Tip: if you use a dark glass bottle for storage, it will help slow oxidation). You can store the oil for 6 months – 3 years depending on the type (I recommend researching the shelf life of your oil). You can hold onto it until you’re ready to make your salve, or use it as a massage oil.
Hot Infusion

.jpg)
Hot infusion methods help you make your infusion in a shorter amount of time, but requires more active participation. For this method you’ll need a double boiler.
If you don’t have one, you can DIY with a sterilized glass, ceramic, or stainless steel bowl or canning jar in a small saucepan. Combine your herbs and oil at the desired ratio in the top half of your double boiler, bowl, or jar. Then fill the bottom half with water and place on a low heat (if you’re using a bowl or jar in a saucepan make sure the fit is snug or that the water isn’t too high that it will spill into the jar). Keep the mixture on low heat for 4-8 hours, occasionally stirring the mixture and filling the water if it has evaporated. If the water gets too low or totally evaporates, the herbs in your oil could burn. This would affect the smell of the oil and later, your salve.
Another, more passive, way to do a hot infusion is with a slow cooker. You place your herbs and your oils in a canning jar at the desired ratio, stir, and place inside the slow cooker with the jar lid loosely placed on the mouth of the jar (this helps keep the oils inside the herbs from evaporating out, but make sure the lid is very loose otherwise you’ll have a pressure explosion on your hands!). Fill the slow cooker with just enough water to cover the height of the mixture in the jar and then place on low heat for 4-8 hours.
Once your infusion is complete, take the jar or bowl away from the heat or out of the slow cooker and allow it to cool. Once cooled, you can strain the infused oil through a cheesecloth or stocking into a sterile jar. A trick Nyambi shared for an easy straining method is to take your cheesecloth or stocking and place it tauntly on the mouth of the jar, screw the metal screw band on top until the cheesecloth is held tightly. Then, slowly tip the jar, let it strain, and voila! Store the oil for 6 months – 3 years until you’re ready to make your salve!
Making the Salve
For making the salve, you will need:
- Herb-infused oil
- Beeswax
- Double Boiler
- Glass jars or heat-resistant tins (for holding the finished salves)
- Essential Oils (optional)
- Vitamin E oil (optional)
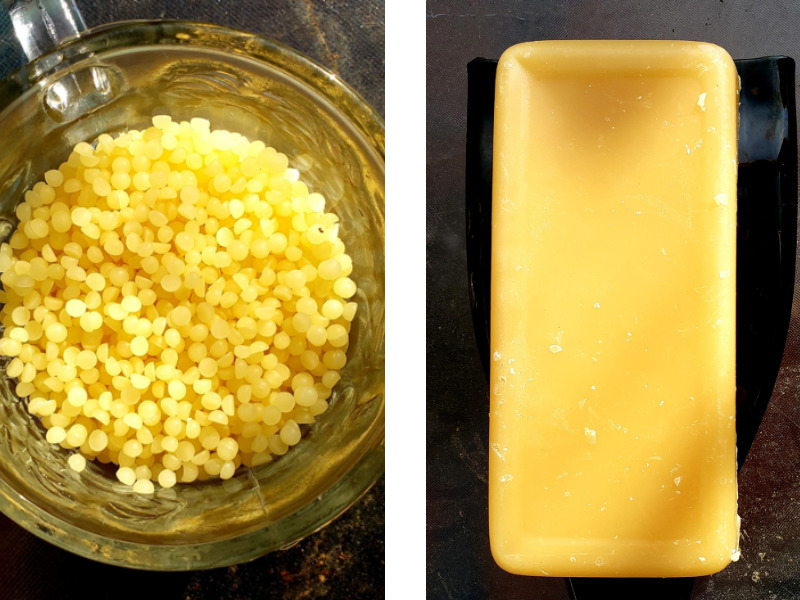
When acquiring beeswax, there are a couple of options: pastilles or blocks. Pastilles are little pellets of beeswax and are easier to measure by volume, while blocks are great if you’re making large amounts and measuring by weight.
If you’re able and have access, choosing to buy beeswax from local beekeepers helps support not only local businesses, but local bee populations as well! Salve making can be a process of care and support not only for the ecology of your body, but the ecology of your community.
When making your salve, the ratio of beeswax to oil will affect its solidity. Increasing the amount of beeswax will make the salve harder, while decreasing it will produce a softer salve. For a solid yet soft consistency, Nyambi recommends using a 1:5 beeswax to oil ratio. Measure out your beeswax pastilles or if you’re using a block, wrap it in a towel and break it up with a hammer on a hard surface and weigh the pieces. Once you have your ingredients gathered, combine your herb-infused oil and beeswax at your desired ratio in the double boiler (or sterilized glass, ceramic, or stainless steel bowl or canning jar). Place the mixture on low heat until the beeswax is completely melted and mixed with the oil. As a test, dip a sterile spoon into the mixture and place it in a refrigerator.
Once it cools, you can determine if its consistency is what you’d like. If the sample is too hard, add more oil and if it’s too soft, add more beeswax. Once you’re pleased with its consistency, you can add the vitamin E oil (if it wasn’t already added during your oil infusion) and/or essential oil if desired. If adding essential oils, wait until the mixture is significantly cooler, but not solid, to avoid the essential oils from evaporating out. Then pour the mixture into individually-sized, dry, sterilized glass jars or tins and allow them to cool. Finally, place the lids on the containers, label, and store in a cool, dry place. Like the herb-infused oil, salves have a shelf life of 6 months – 3 years depending on the oil used. Use them for the desired effects whenever you need, or share them with friends and family to spread the plant love around.
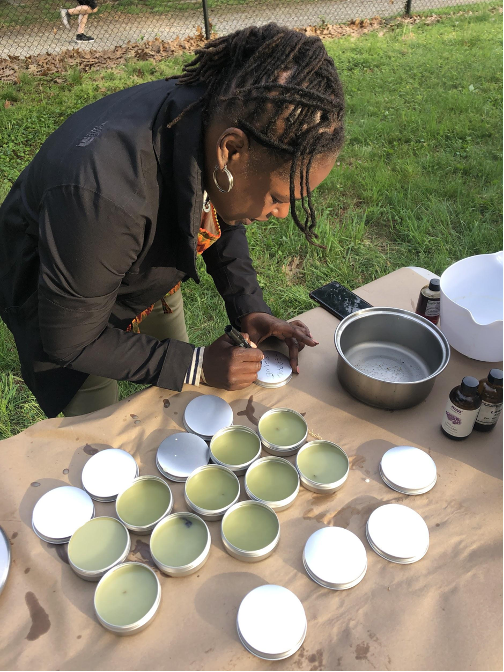
Photo credit:POP.
Recipe Ideas and Choosing Herbs
Coming up with recipes of herb and oil combinations is a fun way to express your creativity and get more in touch with what’s growing in your own backyard, garden, and community. There may be medicine growing in your lawn or garden and you don’t even know it! Dandelions and violets are extremely common to find walking around many Philly neighborhoods and parks whether you live in a city, suburb, or rural area. While they often get tossed away as weeds, they help support local pollinator populations and can be used to support your wellness. Dandelions have pain relieving and anti-inflammatory properties and violets help to soothe dry, irritated skin. The wonder of plants is all around us! Showing itself when we take the time to slow down and take a look.
If you choose to forage any of your plant material, consult plant identification, foraging guidebooks, and/or a local foraging group. Be sure to not forage from roadside, highways, or areas that directly receive chemical spray or runoff. If you suspect the soil or water near the plants may be contaminated, it’s best to let it be. Also, aim to forage with thought, kindness, and ethics. Leave enough for pollinators and other critters, taking only a small fraction of material from each plant and area. If the flowers or plant material are sparse, it’s best to leave it be so as to not disturb the ecology of the site too heavily. You can also grow herbs and flowers in a home or community garden or get them from a local supplier to support local farms.
You can choose your herbs based on what’s growing around you and what effect you’re looking to receive. If you’d like relief for sore muscles, calendula, ginger, cayenne, arnica, and cinnamon have anti-inflammatory and pain relieving properties. If you’re looking for something to have on hand for cuts and scrapes or healing dry, irritated skin then yarrow, calendula, or white pine would be helpful to include. If you’re desiring a more aromatic experience for relaxation, lavender, chamomile, and mint are soothing, while sage and patchouli are grounding. For an energizing aroma, lemongrass, lemon balm, orange, eucalyptus, or mint are all options depending on your preference. Before combining herbs together, consult an herbalist or an herbalist manual to make sure there are no potential reactions from the combination.
Recipe Example:
1 cup (8 fl oz) herb-infused oil
⅛ – ¼ C (1.5-2 oz) beeswax
1 tsp Vitamin E oil (optional)
Approx. 20 drops essential oil(s) optional
Disclaimer
The use of salves or herb-infused oils have not been approved by the FDA. The Philadelphia Orchard Project stresses that you should not consume parts of any wild edible plants, herbs, weeds, trees, or bushes until you have verified with your health professional that they are safe for you.
The information presented on this website is for informational, reference, and educational purposes only and should not be interpreted as a substitute for diagnosis and treatment by a healthcare professional. Always consult a healthcare professional or medical doctor when suffering from any health ailment, disease, illness, or injury, or before attempting any traditional or folk remedies. Keep all plants away from children. As with any natural product, they can be toxic if misused.
To the best of our knowledge, the information contained herein is accurate and we have endeavored to provide sources for any borrowed material. Any testimonials on this web site are based on individual results and do not constitute a warranty of safety or guarantee that you will achieve the same results.
SAFETY PRECAUTION: While there are many plants which are helpful and beneficial for us to partner with, there are plants that are dangerous for us to consume or even to touch. It’s important that we take the necessary precautions – in a city space: avoid harvesting from places with pollution or runoff; avoid harvesting endangered plants; understand there are some plants used medicinally only in small doses vs some that can be consumed with relatively little concern. The most important thing is that you trust your body, go slow with incorporating any new plants into your daily life!