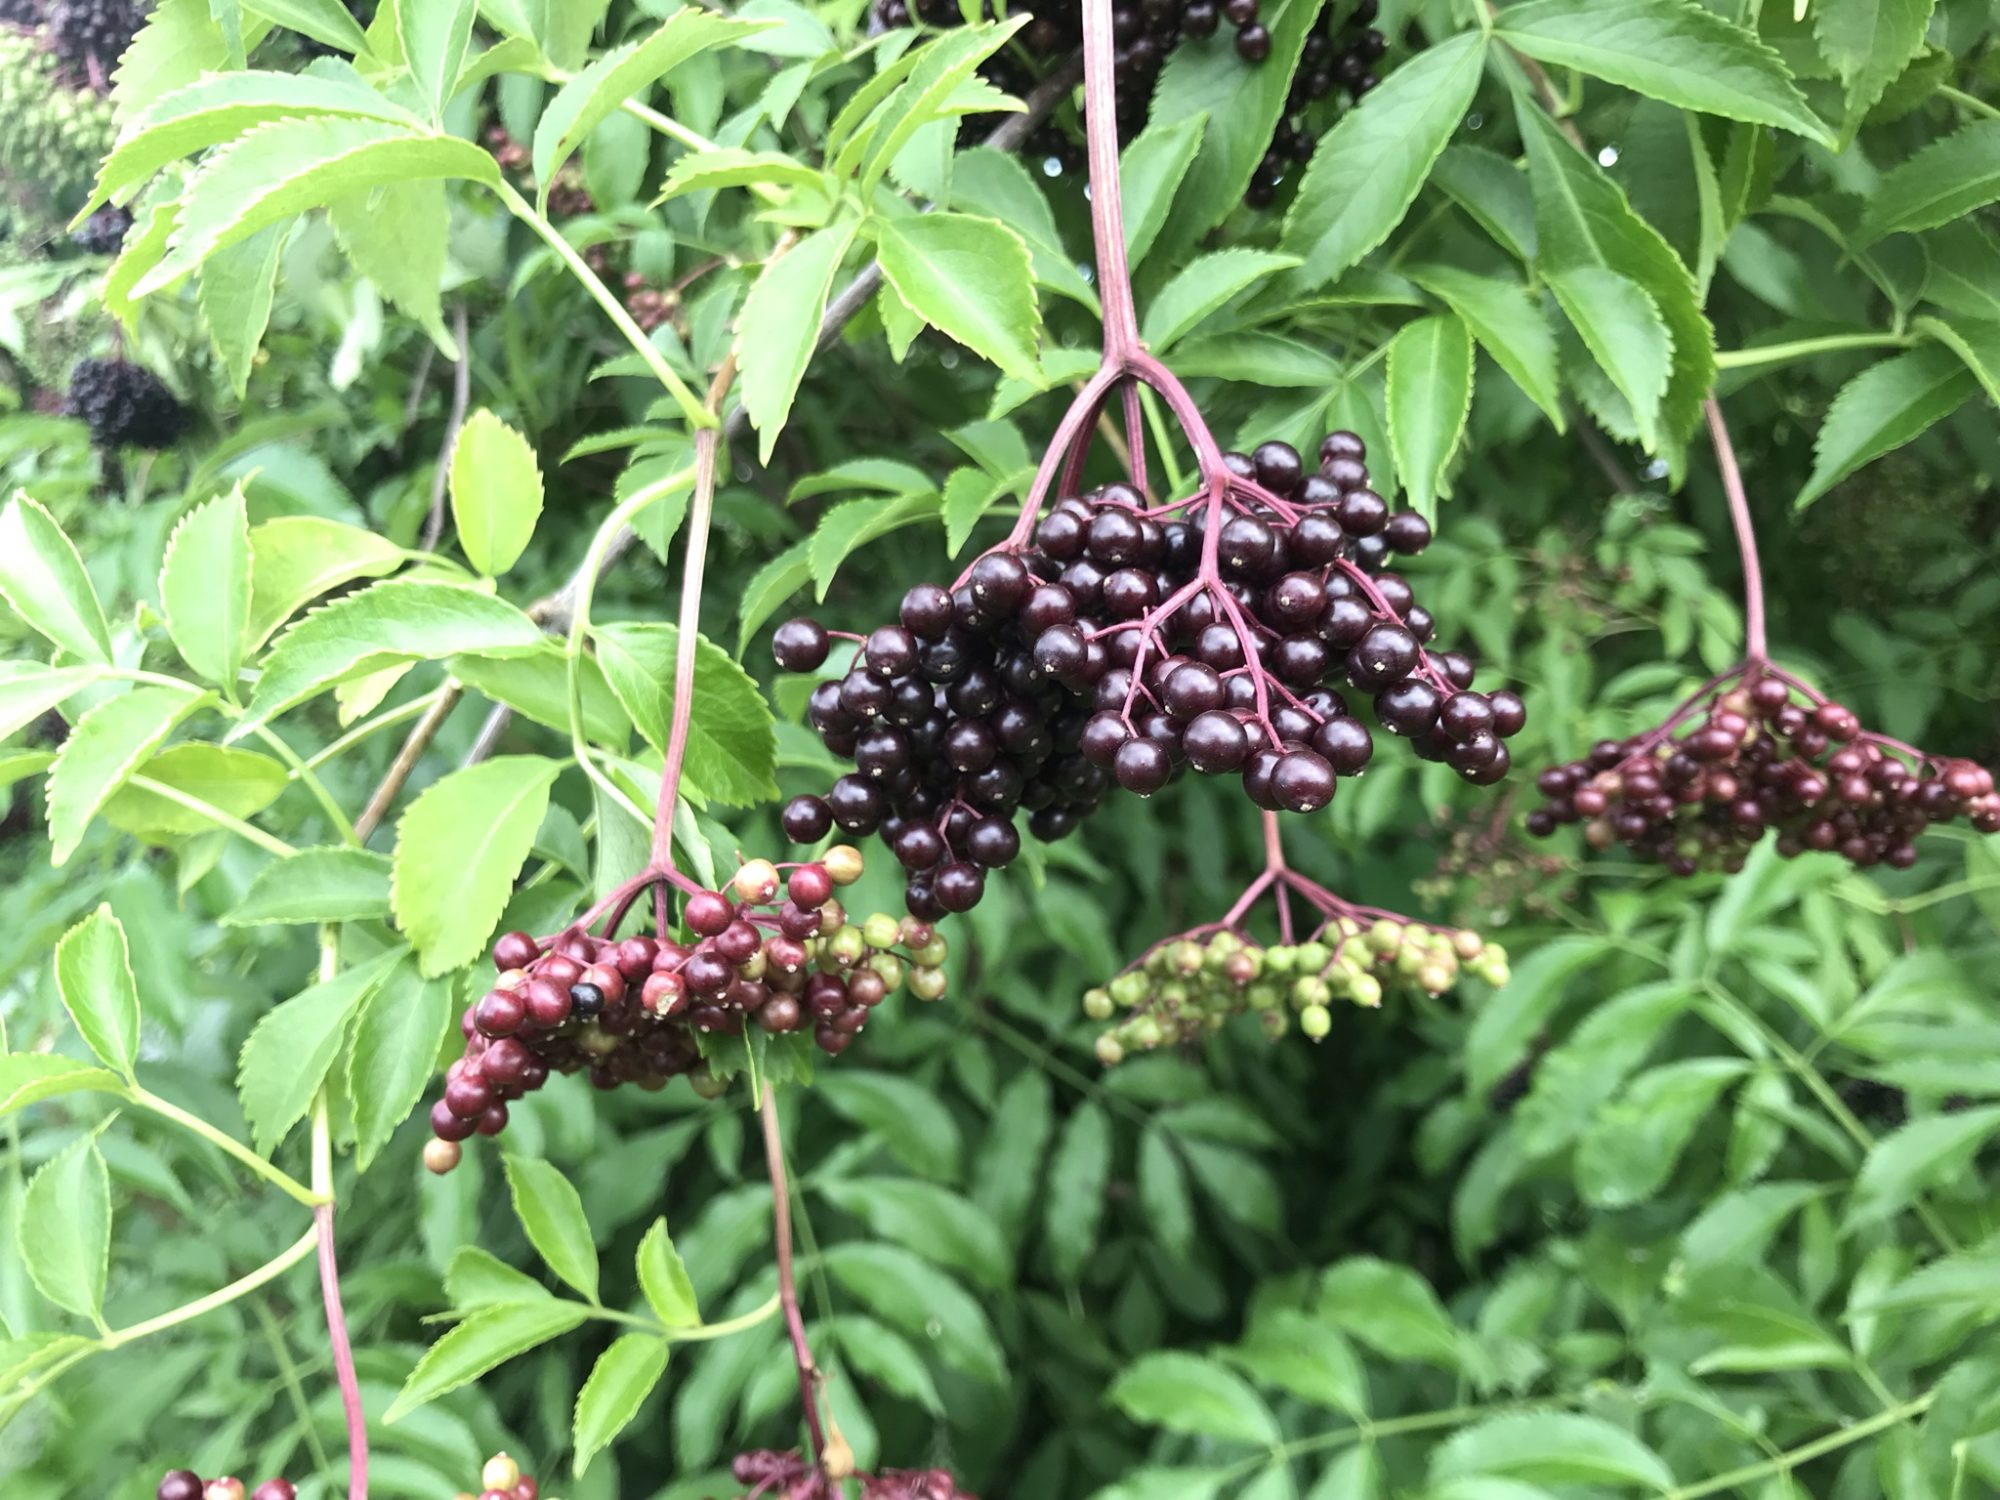
Elderberry has long been in the medicine cabinet as an immune boosting, antiviral hero and rightfully so. Elderberries are full of vitamins and minerals that effectively reduce the severity and duration of colds and flus. We are lucky here on the eastern coast of North America, to have a native species of elder (Sambucus canadensis) that grows easily and prolifically from Florida to Quebec. Other species including the European Elder (Sambucus nigra) and Red Elder (Sambucus racemosa) also grow well here and there are cultivated varieties of each species that feature enhanced fruit production and in some cases, ornamental features.
PROPAGATION
Elderberries are one of the easiest fruiting plants to propagate (along with figs!) and is a good place to start if you’re new to the game.
Timing. You can propagate elderberries in both the dormant and summer seasons, but I definitely prefer the dormant season because it’s easier and I usually have more time. The dormant season in Philadelphia is generally January – March, but you can also tell by looking out for any bud break or green growth. No? Then you’re good to go.
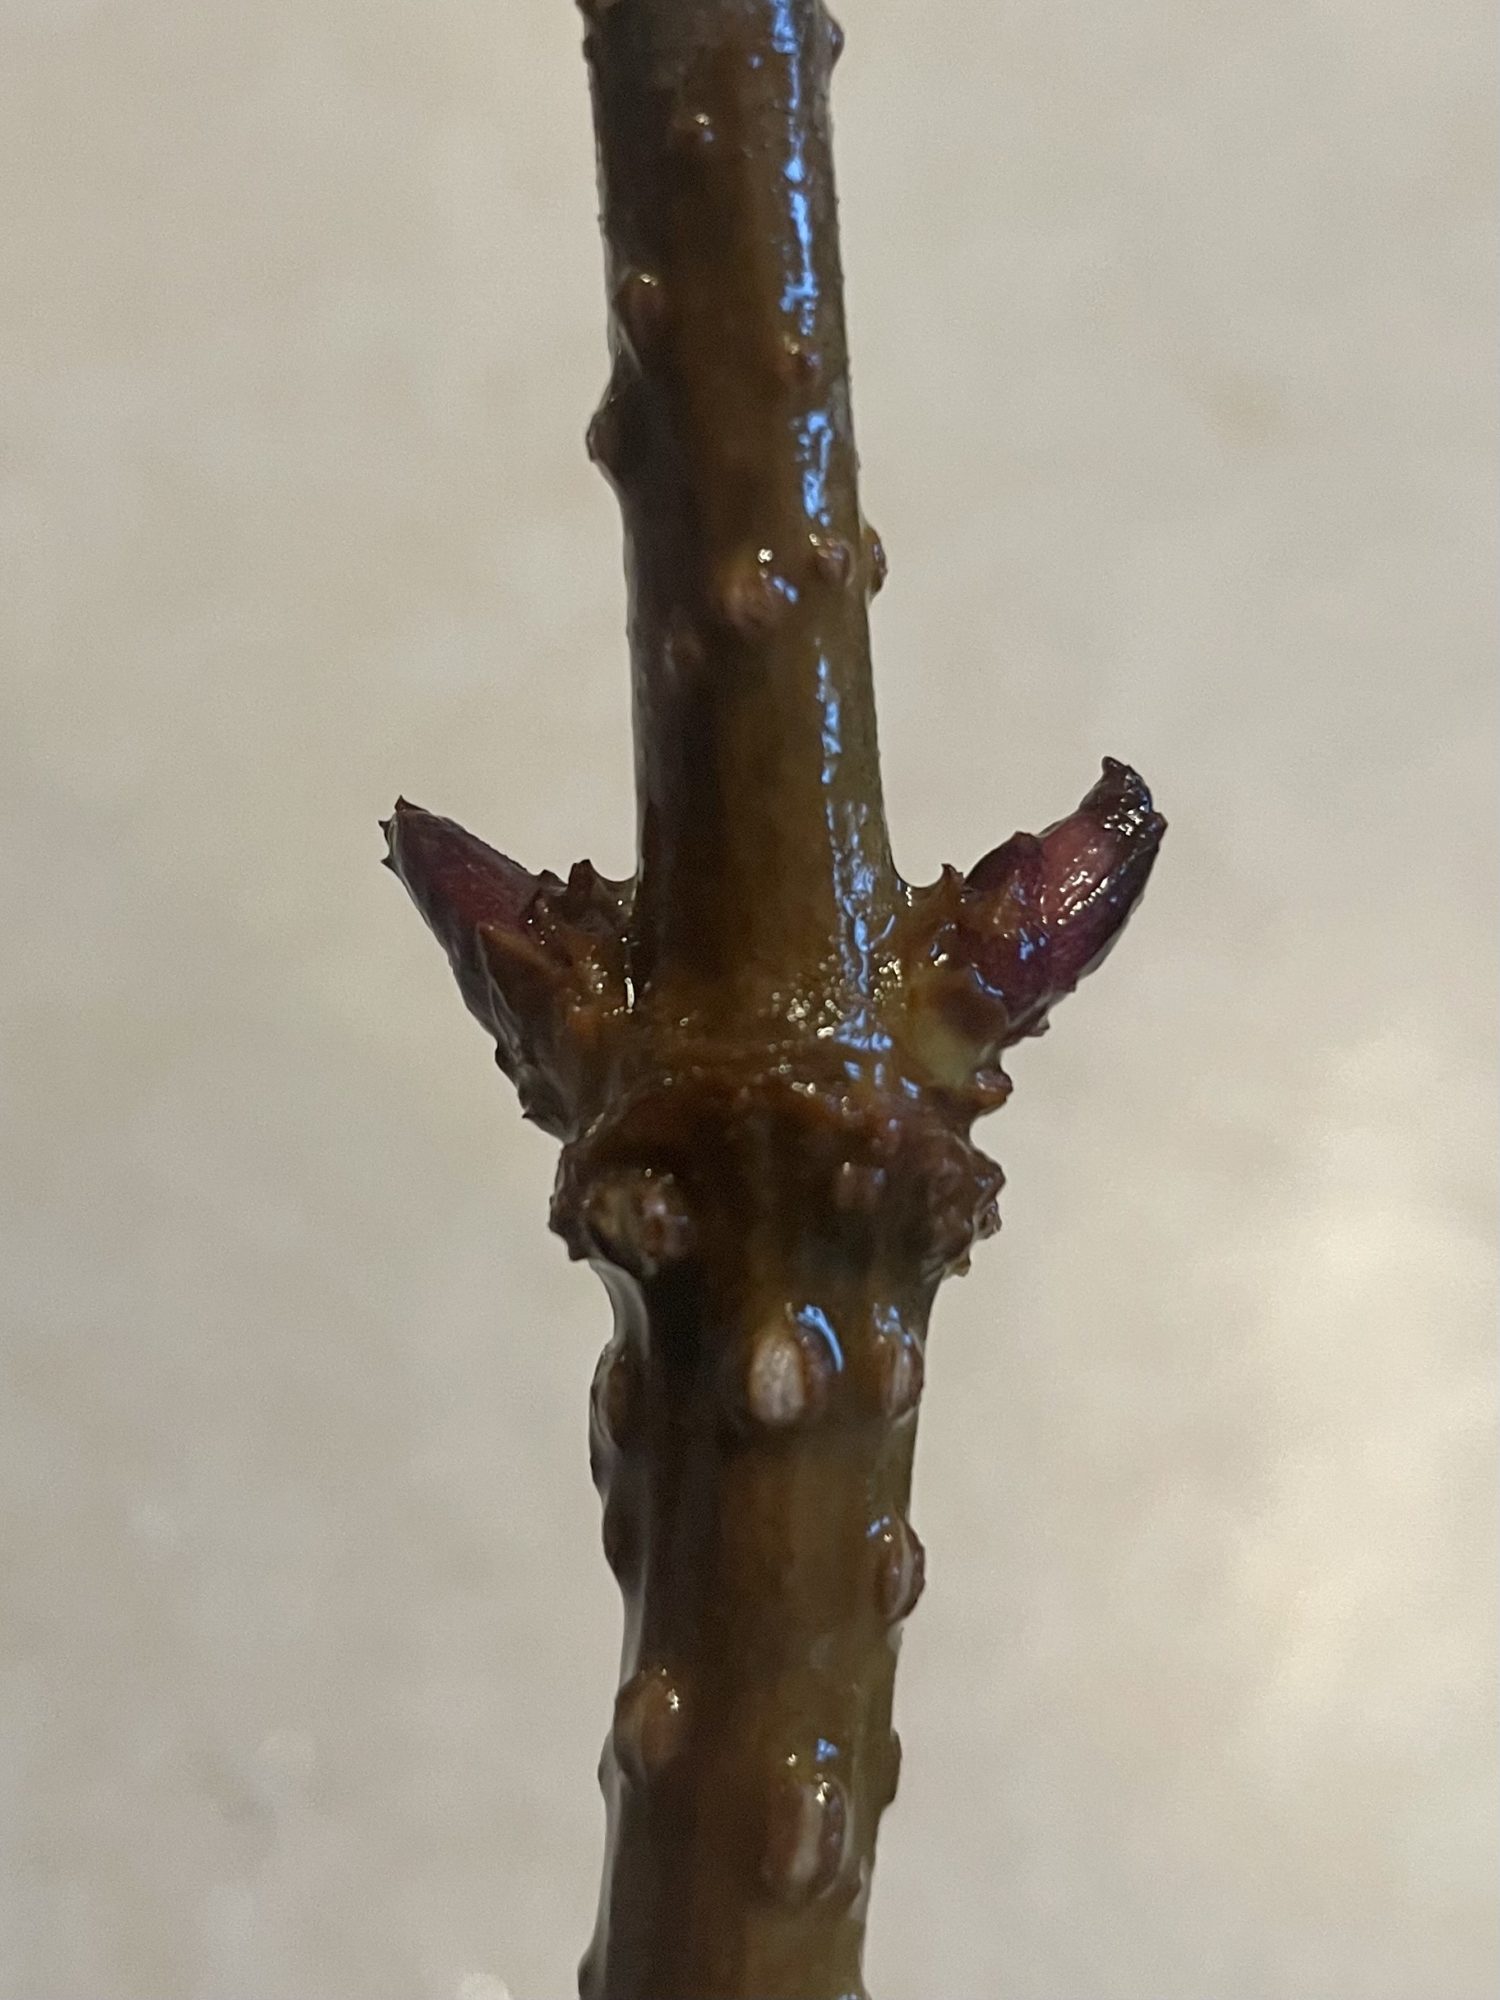
Selection. Take cuttings from healthy established plants, at least 2-3 years old. Cuttings should be brown (not green) in color and free from any damage.
The Cut. Each cutting needs to have at least 2 nodes, 3 is better. One node will be above soil level becoming a leaf and genesis of all aerial parts of the plant. The other 1-2 nodes will be below ground, becoming the roots of the plant. Note that you should have about 1” of wood below the lowest node. It is best practice and industry standard to cut the bottom of the cutting at an angle and the top of the cutting straight across. This will serve both as a cue as to which side is up or down, and also make it easier to stick your cutting into the ground or pot. Don’t forget to sanitize your clippers before making the cut!
After taking the cutting you have 3 choices of what to do next.
- Place cutting immediately into distilled water for 12-24 hours to allow for full hydration. Extra credit if you make a willow tea to act as an organic rooting hormone. Legend has it that curly willow is the most potent.
- Wrap cuttings in damp newspaper/paper towel, label, and then place into plastic bags. Keep in the fridge until ready to plant.
- Stick directly into potting medium or straight into the ground.
Sticking Cuttings, Now it’s time to get these cuttings growing, and again, you have a couple of options in this choose-your-own-adventure journey.
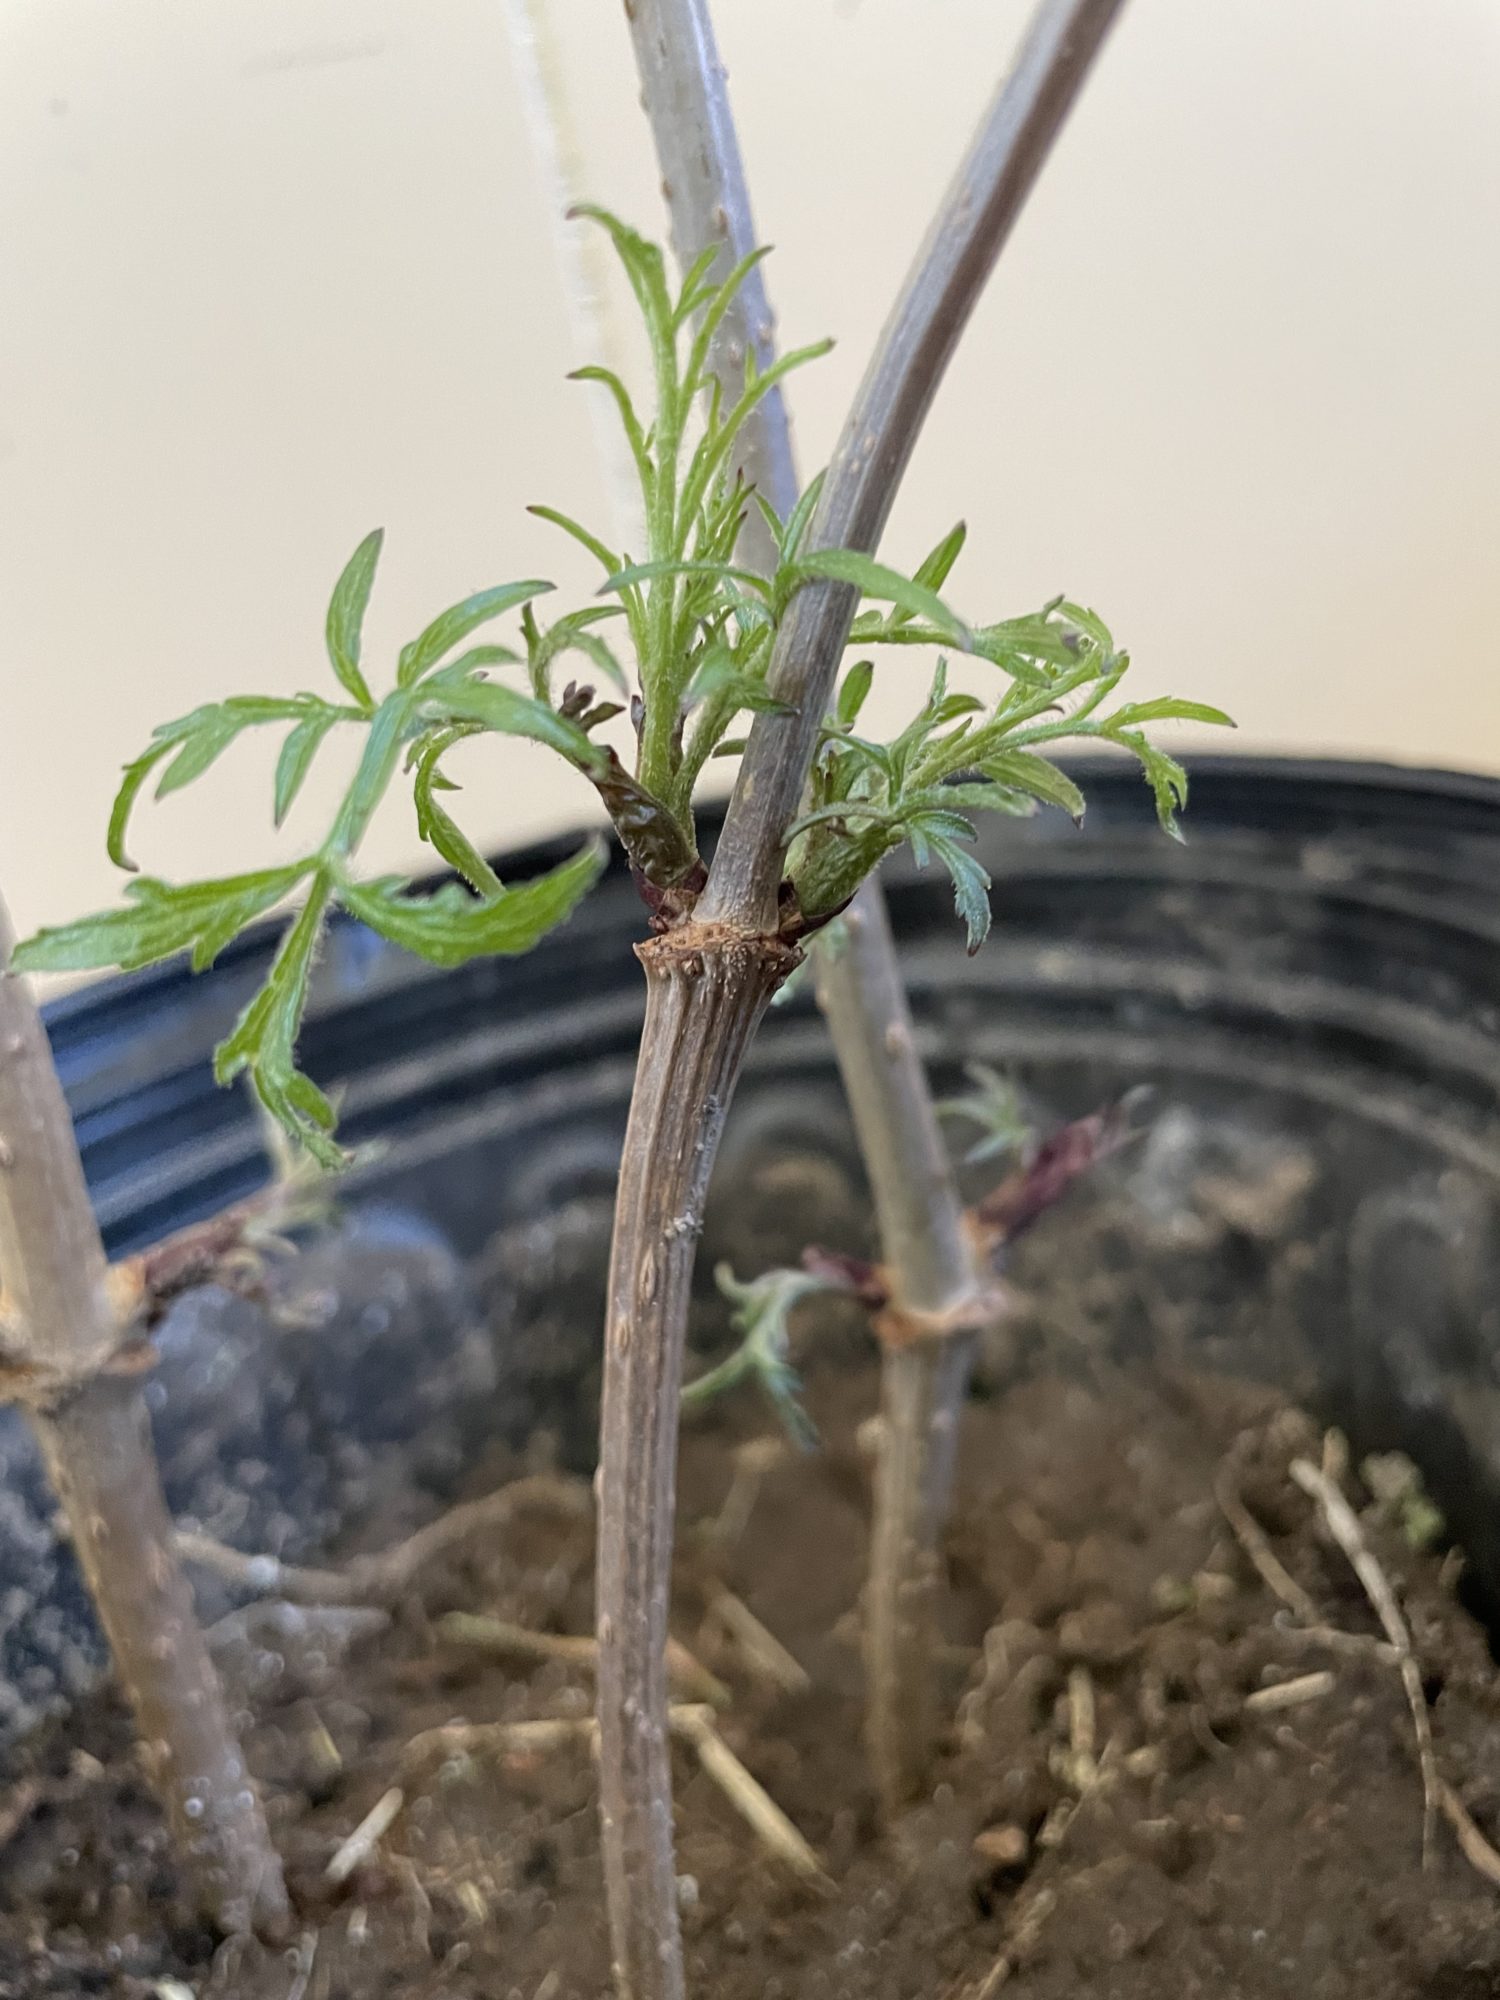
- Plant in container. Gently rough up the wood below the bottom leaf node with a serrated knife to stimulate root growth. Dip bottom tip into raw honey which is both antibacterial and nutritional, acting as a natural rooting hormone. Fill deep containers with a mix of equal parts sand and coconut coir as the soilless medium. Even moisture is the goal. Place 3 cuttings per container. Dibble holes and place cuttings with at least 1 node above and 1 below the soil line. Water in well.
Place containers in an unheated, sheltered, shady and slightly moist environment with an average temperature of 50 degrees and out of danger of a deep freeze (garage, basement). If plants are becoming too dry, try creating a mini-greenhouse by placing a plastic bag loosely over pots. Check moisture weekly and water as needed. Cuttings should begin to root out in about 6-8 weeks and be ready to transplant out in 10-12 weeks. In the right conditions, success rate is over 90%.
- Root out in water. It is possible to root out your cutting in water, though your success rate will drop to about 40-60%. For best results, change out the water every 3-4 days, mist with water daily, and consider rooting in a willow tea rather than straight water. Place in a sunny window. Expect to root out in 6-8 weeks.
- Stick in ground. Sticking should take place in early spring before bud break. Push angle side down into ground so 1 node is left above ground, and 1-2 nodes are underground by at least 1”.
FROM SEED
Elders can also be propagated through seed. To start your own elder shrub from seed, pick your own cluster of elderberry fruits and hang them upside down in the sun to dry. Shake the seeds loose from the dehydrated pult and put them in a bag in the refrigerator for 8-12 weeks to stratify them.
GROWING INFO
Location, location, location.
Elderberries need a sunny to partial shade spot with decent drainage. Plan for the shrub to get 10-15’ tall and 8-12’ wide.
- Full sun is considered a spot that gets 6-8 hours of sun, partially shady areas get 3-6 hours sun. Note that more sun always means more fruit, even for plants that will tolerate partial shade.
- Good drainage is important for most plants. This is because roots are living things and need to breathe! When soils are water logged, there is no space for oxygen to move through the soils and the roots essentially drown. Elderberries can tolerate occasional flooding, but not constantly “wet feet”. Learn how to check the drainage of your site here. If the location drains poorly, you can build up a berm to create the drainage needed.
- Elders are generally not very picky about their soil type, but would prefer slightly acidic soil. The only way to know your soil’s acidity is to get a soil test. Local ag extensions are usually a good way to go. Over here, we like to send our soils off to the labs at Penn State Ag Extension or UMass Amherst.
FIRST YEAR CARE. The first year after planting is critical to the overall health and vigor of the plant. Pay extra attention to these few things the first year, and you should be rewarded by an easy low maintenance elderberry by year 3.
- Water. Make sure your newly planted elderberry gets at 1” of water a week (either through rainfall or irrigation) for the entire first growing season.
- Weed. Especially while the plant is young, be sure to keep the area weeded, being particularly intolerant to perennial grasses. Elderberries have shallow, mat-like root systems. This translates into elderberries not being able to compete well with weeds for water and nutrients. Keeping the area mulched with 3” of wood chips will do wonders in suppressing weeds and retaining moisture.
- Wait. As with many perennial fruits, it is wise to remove the flowers from the plant in the first season. Producing fruit is a huge energy sink for plants and if they put most of their energy into the fruit, the plant won’t have much energy left for growing the structure of the plant itself. Before you grow fruit, you need a place to hang it! Rooted cuttings should begin to fruit at 3 years.
PRUNING
Older elderberry canes become less productive as they age. Once 4 years old, renew growth by removing oldest (thickest, shaggiest) branches. Make thinning cuts to remove the entire branch to 1 to 2″ above ground. Thin out any thin or weak growth. Never remove more than 30% of total shrub.
PEST AND DISEASE MANAGEMENT (Hint: The answer is netting).
American elderberries are generally seen as having minimal insect and disease pressures, especially when not grown at commercial scale. Except, of course, for the birds. The only way to keep them out effectively is with netting. Netting should be put up just before ripening through end of harvest.
An up and coming pest for our elderberries are Spotted Wing Drosophila (SWD). SWD have recently arrived on the East Coast and are beginning to cause major crop losses for all types of berry growers. SWD is a unique type of fruit fly in that it lays its eggs in immature and ripe fruit, rather than just overripe or rotten fruit like most fruit flies. SWD do not lay their eggs when evening temperatures are over 80 degrees, which may be what is what keeps their populations under control in our climate. The most effective organic control for SWD (along with birds and Japanese beetles) is netting. Small mesh netting hung over a structure and pinned to the ground should be put up when fruit begins to color and left on until the end of harvest.
HARVESTING
Before consuming elderberries, please read POP’s edible plant disclaimer at the end of this article.
Elderberries need to be cooked before eating. Elderberry seeds contain cyanogenic glycosides which when eaten raw in quantity cause diarrhea and upset stomach. Cooking the berries destroys the cyanogenic glycosides and allows us to enjoy this sweet, tart, immune boosting fruit.
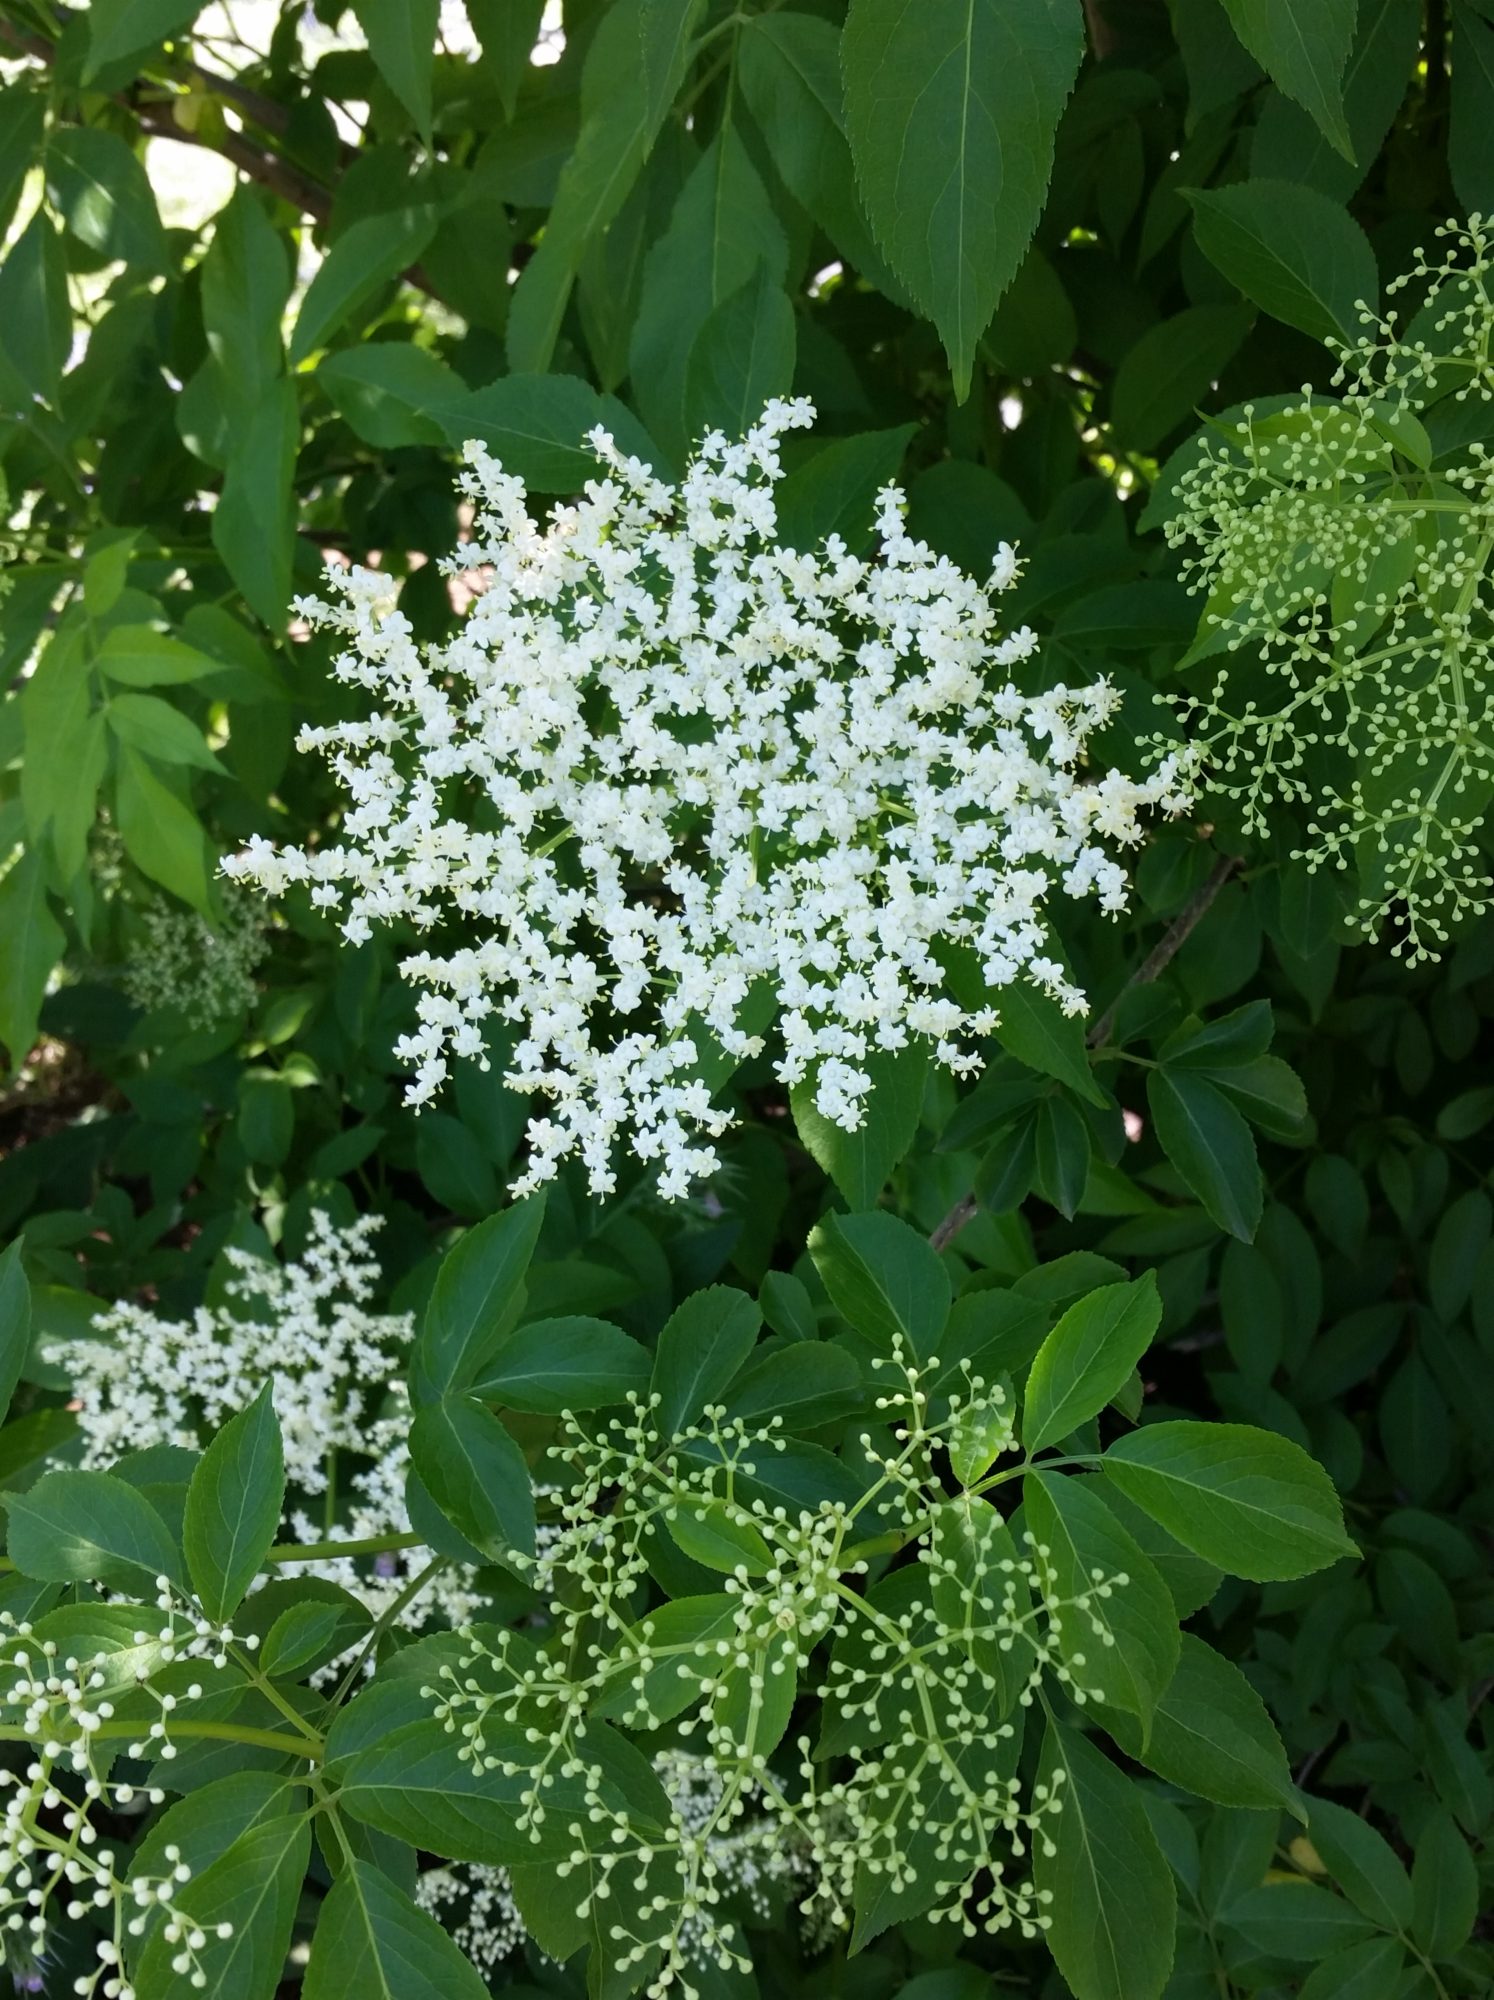
You can harvest both the flowers and berries for medicine making. The flowers are ready to harvest when at least 2/3rds open. Gently rub umbels on mesh screen to remove individual flowers. Flowers should be used immediately, dried, or frozen.
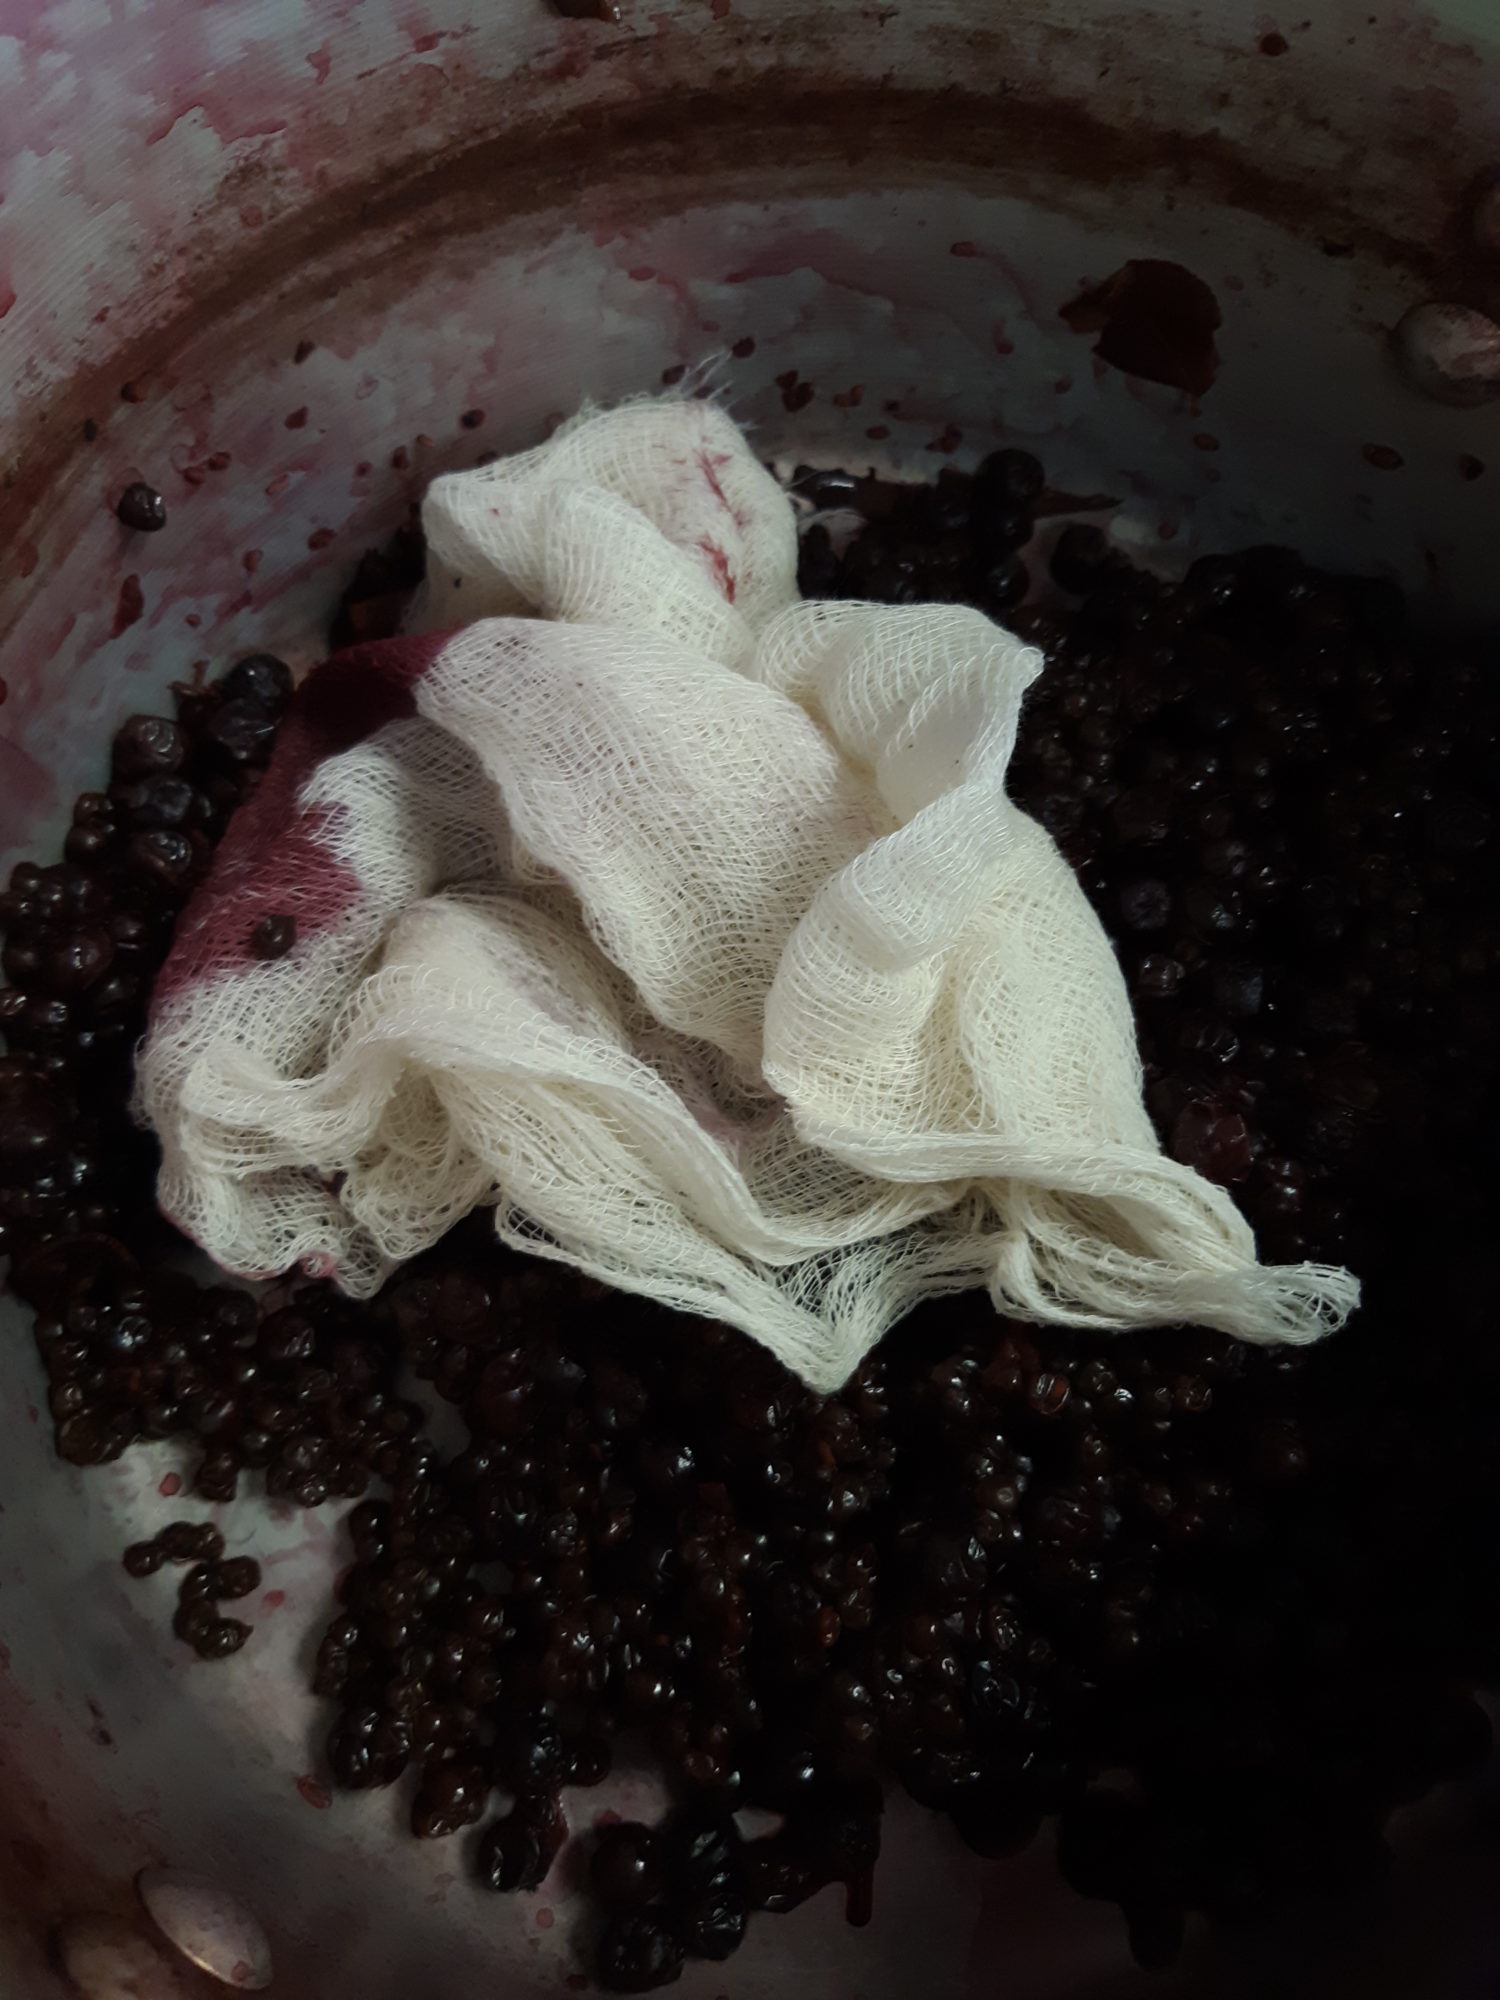
Fruit ripens unevenly on most cultivars, often over a two week period. When berries are ripe they will be a deep purple black color, and when squished have a bright red juice. To minimize squishing and staining, wash and freeze whole bunches of berries on a tray. Remove the frozen berries from the stem, storing berries in a sealed bag until you’re ready to use.
ELDERBERRY SYRUP
For a family sized batch.
Ingredients:
- 2 1/2 cups elderberries or 1 cup dried
- 4 cups water
- 1 cinnamon stick (optional)
- 1 tablespoon chopped ginger
- 1 cup honey (roughly)
- 1 cup brandy or other alcohol
Add ingredients to pot, bring to boil, and simmer for 45 minutes. Remove from heat and smash berries. Strain syrup through colander and return to pot. Simmer for additional 30-45 minutes, or until volume reduced by half. To the volume of reduced strained elderberry juice, add equal parts honey and optional 1 cup brandy to preserve. Store in fridge and use within 3 months, if preserved with alcohol, use within year. Add to tea or water, as needed, 1 tablespoon at a time.
Disclaimer
The Philadelphia Orchard Project stresses that you should not consume parts of any wild edible plants, herbs, weeds, trees, or bushes until you have verified with your health professional that they are safe for you. As with any new foods that you wish to try, it is best to introduce them slowly into your diet in small amounts.
The information presented on this website is for informational, reference, and educational purposes only and should not be interpreted as a substitute for diagnosis and treatment by a health care professional. Always consult a healthcare professional or medical doctor when suffering from any health ailment, disease, illness, or injury, or before attempting any traditional or folk remedies. Keep all plants away from children. As with any natural product, they can be toxic if misused.
To the best of our knowledge, the information contained herein is accurate and we have endeavored to provide sources for any borrowed material. Any testimonials on this web site are based on individual results and do not constitute a warranty of safety or guarantee that you will achieve the same results.
Neither the Philadelphia Orchard Project nor its employees, volunteers, or website contributors may be held liable or responsible for any allergy, illness, or injurious effect that any person or animal may suffer as a result of reliance on the information contained on this website nor as a result of the ingestion or use of any of the plants mentioned herein.
This POP Blog was written by Education Director Corrie Spellman-Lopez.
SUPPORT US! If you found this entry useful, informative, or inspiring, please consider a donation of any size to help POP in planting and supporting community orchards in Philadelphia: phillyorchards.org/donate.
SOURCES
University of Maine, Elderberry Guide