Mushroom season is among us! Now’s the time of year to forage for mushrooms and grow your own mushrooms. In terms of cultivation, there are many ways to go, whether it be growing on logs, in a bag, or on mulch. Growing mushrooms in mulch can be a nice way to incorporate mushrooms into your garden. It is both an affordable way to grow mushrooms– especially mushrooms that aren’t typically commercially available– and also beneficial for the quality of your soil. It’s also much easier than indoor cultivation or growing on logs and doesn’t require any special equipment. All you really need is mulch, mushroom spawn, and a consistent supply of water.
MATERIALS
Let’s talk mulch. In gardens, mulch is used to keep down weeds, retain moisture, and create a neater look. For mushrooms though, the substrate provide a home and a source of nutrients for the mycelium. It is important to acknowledge the different types of mulch because the type of mulch you use is dependent on what mushroom you want to grow. For most mushrooms this usually mean wood chips or straw (not hay). After the spawn in placed into the mulch, the mycelium spreads throughout the mulch.
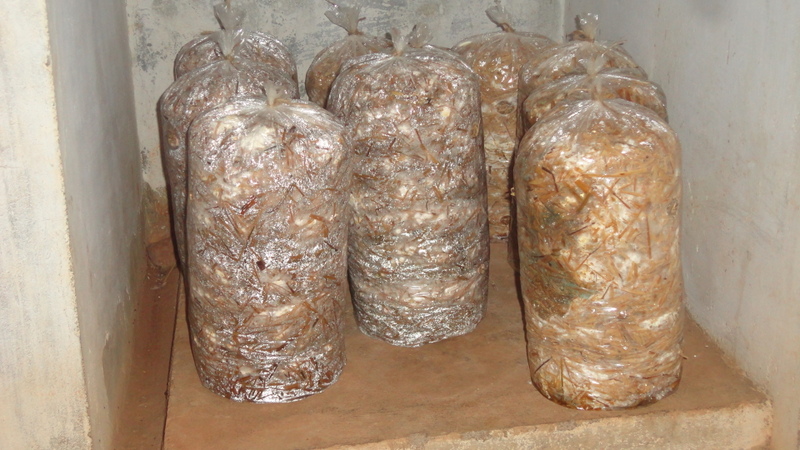
What is spawn? Spawn is a carrier that holds the mycelium of a specific strain of mushroom. Spawn is used similarly to how people use seeds with gardening– it is used as a means to grow the edible part. With spawn, it is ultimately transferred to another medium (substrate) where the mycelium can expand and produce mushrooms. Spawn can come in many different forms– sawdust spawn, grain spawn, or plug spawn. Sawdust spawn is mycelium grown into hardwood sawdust and can be used for growing on logs, in bags, and in mulch beds. Grain spawn is sterilized grains that have been inoculate with mycelium. It is typically used for bags or mulch beds. Plug spawn is mycelium inoculated onto a wooden dowel. This type of spawn is typically used for log inoculation.
WHAT MUSHROOMS CAN BE CULTIVATED IN MULCH?
As with plants, different mushroom types require different environmental conditions, so it’s important to pick suitable mushrooms for this method of growing. The types of mushrooms appropriate for growing in mulch are: Winecap (Stropharia rugosoannulata.) and Oyster (Pleurotus spp.). Real quick side note, but what does mulch really mean? It is any material that covers the top of a bed and keeps in the moisture, reduces erosions, and mitigates any weed pressure. Common mulches that are used are woodchips, straw, shredded leaves, and pine mulch. For mushrooms, it’s mostly hardwood woodchips and straw that are used.
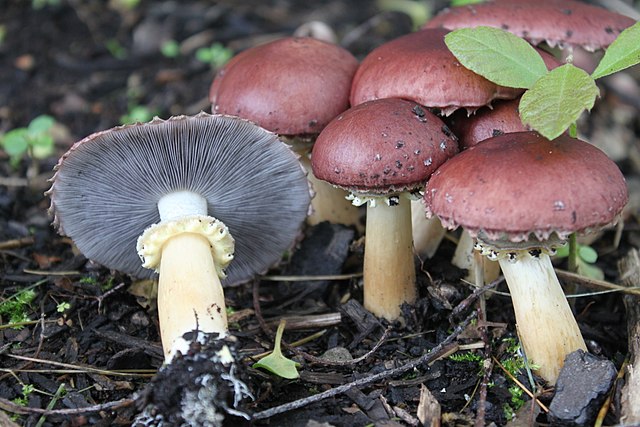
Winecap is one of the easiest mushrooms to cultivate outdoors. Other names for it are King Stropharia and Garden Giant. This is because the caps can get really big, like dinner plate big! The caps are burgundy red and grow on top of a stem. Sometimes the caps grow white, fluffy tufts, typically when they are young. They have gills, purple-grey in color and the stem and flesh is white. They are especially easy to identify because they are the only mushroom of their type with a secondary ring below the gilled top (see photo below). Winecaps have an umami flavor, with earthy and herbal tones. They are native to N. America and Europe and were naturalized in Australia and New Zealand. They are found all over the United States, but are more abundant east of the Great Plains. They can be found growing in woody debris in the forests, but not on logs. Supposedly, they are also active hunters and can consume nematode worms. What distinguishes Winecaps from other mushrooms is that they can tolerate some direct sun. When growing them, they prefer wood chips, but can also grow on straw. It’s best to use grain spawn or sawdust spawn. They will fruit through spring and fall in temperate climates.
Oyster mushrooms are a very vigorous mushroom that can outcompete other mushrooms and contaminants. They have fan-shaped caps that can be frilly on the edges and are white, grey, or tan. They have white gills. They either grow as clusters of small mushrooms or individually as a large mushroom. They grow naturally on or near trees in temperate and subtropic forests all over the world. Oysters have a delicate flavor and meaty texture. They are very popular in Chinese, Japanese, and Korean cooking. They are quite flexible with substrates and can be grown on straw, coffee grounds, and agricultural byproducts. However, they grow best in straw. Make sure to use straw and not hay, because hay contains seed heads which can attract contaminants and weeds. Grain spawn and sawdust spawn work best. They will also fruit through spring and fall in temperate climates.
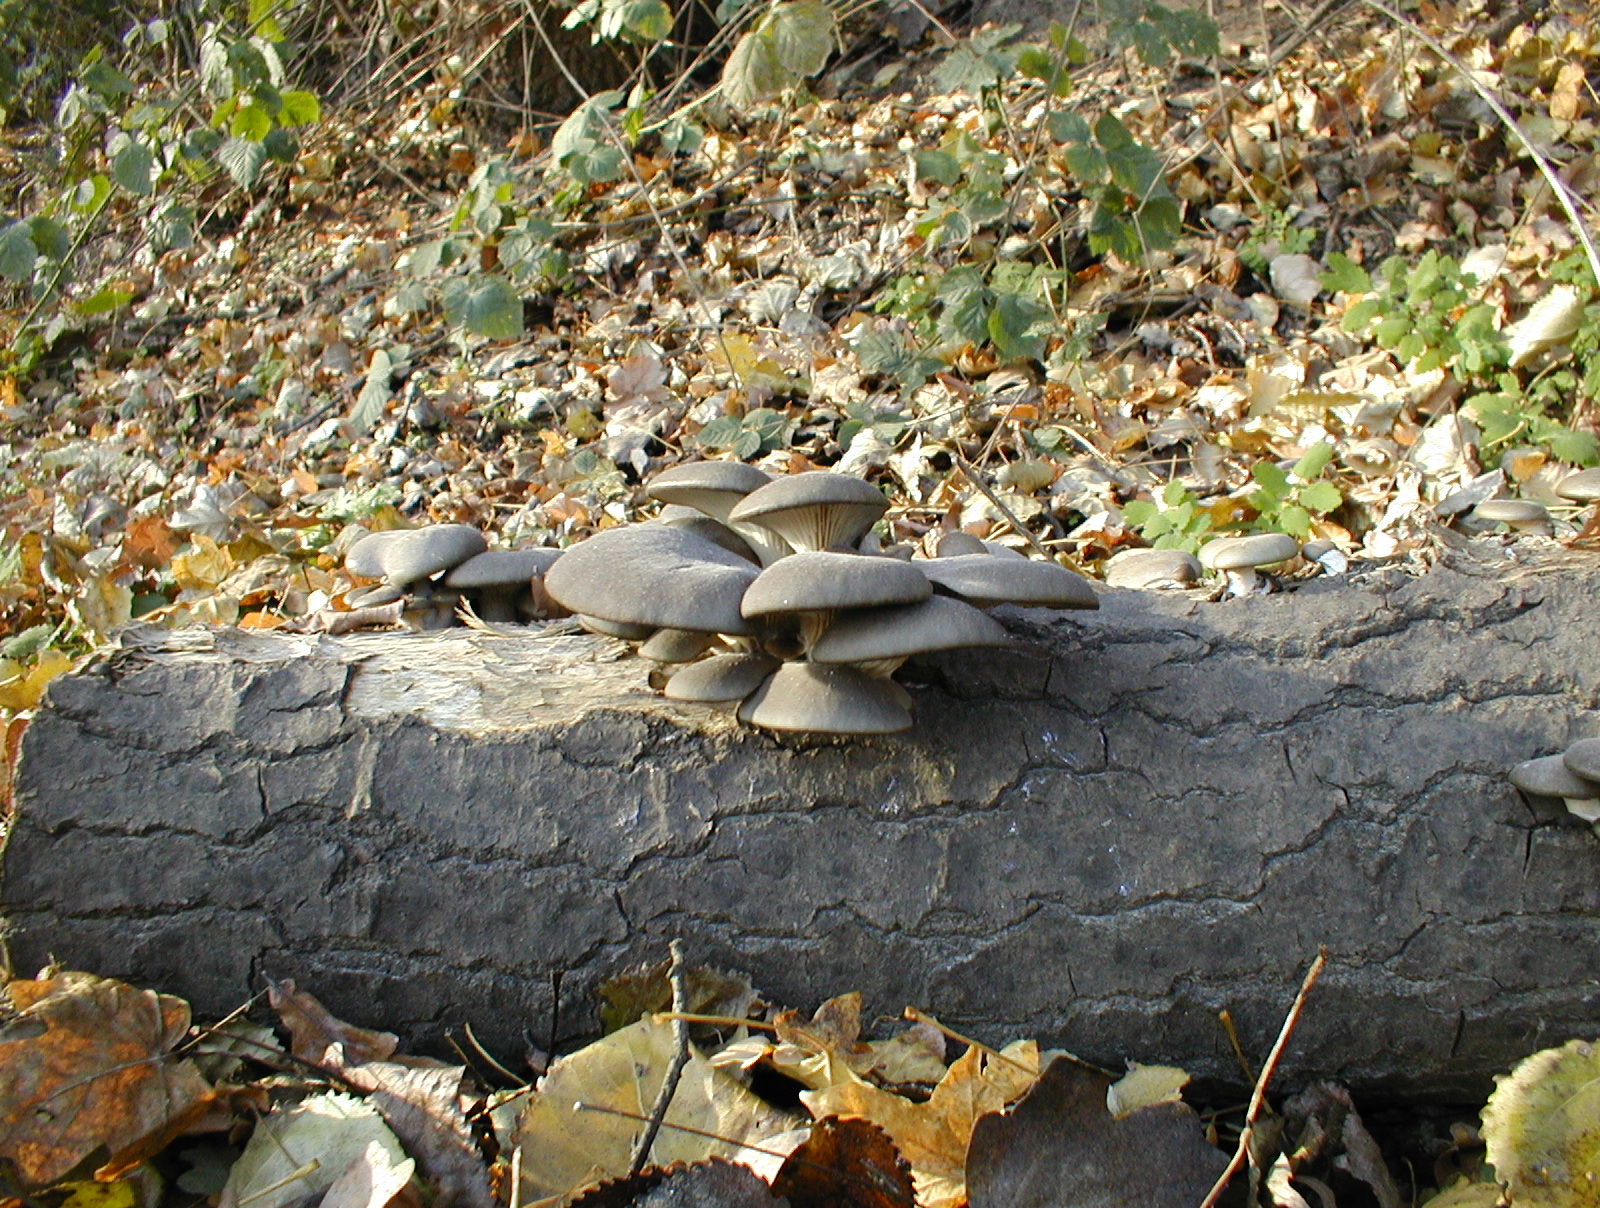
Photo: Jac. Janssen, Wikimedia Commons
HOW-TO INSTRUCTIONS FOR CULTIVATING MUSHROOMS IN MULCH
Winecap Mushrooms
LOCATION: Pick a spot with partial shade, though some direct sun is fine. Good areas to grow them are around trees, forest edges, and perennial gardens. One bag (2.5 lb.) of spawn can inoculate a 5 ft x 5 ft area.
MATERIALS: Grain spawn or sawdust spawn (4 lb.) work fine. Softer hardwood wood chips, like Poplars and Aspens, are ideal but winecaps are pretty adaptable. Softwood wood chips, like Pine, are usually a big no for growing mushrooms, but Winecap can tolerate a little bit, but no more than 50% of the mix. A combination of sawdust and hardwood chips is fine. Make sure there aren’t any large pieces of wood mixed into the mulch. Fresh chips are better because there is less competition with other potential fungi living in the wood. If using straw, make sure it’s not hay, because hay contains seed heads which can attract contaminants and weeds. It’s easier for Winecaps to colonize the straw if its chopped into 1 – 3 inch pieces.
SITE PREP: Clear out area until there is bare soil. You can add fresh soil on top if you want. Winecaps like to be in contact with the soil. If there is lawn grass that’d hard to remove, laying cardboard on top and covering it with fresh soil is a solution. You can also build a raised bed with fresh soil and/or cardboard on top if that’s preferred.
BUILD THE BED: You can soak your spawn prior to building the bed, but it’s not essential. Pour the substrate (woodchips or straw), about 1 inch deep. Break up your spawn and sprinkle a layer on top of substrate. Add more substrate on top, about 2 inches deep. Repeat this layering until you run out of material or have reached your desired bed height. Make sure the top of the bed is covered in substrate to keep it moist and protected. Immediately water it. Keep it moist throughout the first season and especially water the bed during dry spells.
MAINTENANCE: Keep the bed moist, especially the first few weeks. Don’t overwater, since that will create an anaerobic environment, but keep it evenly moist so that the mycelium can spread. One tip for keeping the bed moist is to lay a tarp or plastic sheeting on top. Once the mycelium has take a strong hold over all the substrate and you notice little mushrooms, you can take tarp off. Try to keep it consistently moist throughout the first season. Over time, you will only have to water during dry spells. Fresh substrate can be added to the bed over the years.
FRUITING: If the bed was built in the spring, expect mushrooms to start popping off around two months later. If done in the fall, mushrooms won’t appear till the spring. If you keep up with watering, Winecaps can fruit for several years.
Oyster Mushrooms
The method is basically the same for Oyster mushrooms as it is with Winecaps.
LOCATION: Find a partially shaded location, away from plants and debris. Like most mushrooms, Oysters don’t tolerate direct sun very well. One bag (2.5 lb.) of spawn can inoculate a 5 ft x 5 ft area.
MATERIALS: Grain or sawdust spawn (2.5 lb.) work for this method. Straw is preferred over anything else (obviously make sure it’s not hay) and it’s better to break it up into 1- 3 inch pieces. You can also use other agricultural byproducts, like cotton waste, corn stalks and leaves, and sawdust.
SITE PREP: Clear away any plants down to bare soil. You can also lay down cardboard on top. A raised bed with cardboard on top also works.
BUILD THE BED: The layering method is the same as with Winecaps. Start with a straw layer and sprinkle broken up spawn on top and keep layering until desired bed height is reached. Make sure top layer is straw.
MAINTENANCE: It’s imperative to keep the bed moist first few weeks. Though not as important, try to keep the bed consistently moist during that first season, until the mycelium have fully colonized the substate. From then on froward, just water during droughts.
FRUITING: You can build the bed anytime from spring to fall, but if planted in fall, you won’t get mushrooms till following spring. It’s not recommended to grow heat-loving Pink Oysters, since it’s likely they won’t overwinter in this climate.
OTHER POP BLOG POSTS ON GROWING MUSHROOMS
Mushroom Inoculation: Recap and How-To
Partnering with Stropharia: Integrating Beneficial and Edible Mushrooms into a Forest Garden Design
REFERENCES
North Spore: Growing Mushrooms
Eat the Planet: Winecaps Are Voracious Hunters
DISCLAIMER
The information presented on this website is for informational, reference, and educational purposes only and should not be interpreted as a substitute for diagnosis and treatment by a health care professional. Always consult a healthcare professional or medical doctor when suffering from any health ailment, disease, illness, or injury, or before attempting any traditional or folk remedies. Keep all plants away from children. As with any natural product, they can be toxic if misused.
The Philadelphia Orchard Project stresses that you should not consume parts of any wild edible plants, fungi, herbs, weeds, trees, or bushes until you have verified with your health professional that they are safe for you. As with any new foods that you wish to try, it is best to introduce them slowly into your diet in small amounts.
This POP Blog was written by Orchard Assistant Simone Shemshedini.
SUPPORT US! If you found this entry useful, informative, or inspiring, please consider a donation of any size to help POP in planting and supporting community orchards in Philadelphia: phillyorchards.org/donate